How to Port Flutter SDK to Set-Top Boxes for Android TV Apps Running and Development


Recently we successfully ported the Flutter framework to set-top boxes with the RDK open-source software platform. In this article, we will talk about the difficulties and nuances encountered.
Contents
Given that the RDK software stack or Reference Design Kit is now heavily used to develop OTT applications, voice control for set-top boxes and other advanced features for video-on-demand (VoD), we wanted to see if Flutter could work on a set-top box. It turned out that yes, but, as is usually the case, there are nuances. Next, we will describe the process of porting and running Flutter on the Embedded Linux platforms step by step and see how this open-source SDK from Google feels on hardware with limited resources and ARM processors.
But before going directly to Flutter and its benefits, let's say a few words about the original solution, which was used on our set-top boxes. The board was running the "EFL library suite + Wayland protocol", and the drawing of primitives was implemented from node.js based on a plugin native module. This solution was quite good in terms of frame rendering performance, but EFL itself is not the newest rendering framework. And in runtime, node.js and its huge event-loop didn't seem like the most promising idea anymore. Meanwhile, Flutter could allow us to use a more productive rendering bundle.
For those who are not in the know: Google introduced the first version of this open-source SDK six years ago. At that time, Flutter was suitable for the Android OS only. Now you can write applications for the web, iOS, Linux and even Google Fuchsia. :-) A working language for apps development on Flutter is Dart, it was launched as an alternative to JavaScript.
The question before us was: Will switching to Flutter give any performance gain? After all, it uses a completely different approach, although there is the same graphics subsystem Wayland + OpenGL. We were also wondering how is it with the support for processors with neon instructions? There were also other questions, such as the nuances of porting our UI to dart or the fact that Linux support is in the alpha-beta phase.
Building the Flutter Engine for ARM-based set-top boxes
So, let's begin. First, Futter must be run on an alien platform with Wayland + OpenGL ES. Flutter's rendering is based on the Skia library, which perfectly supports OpenGL ES, so in theory everything looked good.
When building Flutter for our target devices (three set-top boxes with RDK), to our surprise, problems occurred on only one STB device. We decided not to fight with it, because its old intel x86 architecture was not our priority. It is better to focus on the two remaining ARM platforms.
Here are the options we used to build the Flutter Engine:
./flutter/tools/gn \
--embedder-for-target \
--target-os linux \
--linux-cpu arm \
--target-sysroot DEVICE_SYSROOT
--disable-desktop-embeddings \
--arm-float-abi hard
--target-toolchain /usr
--target-triple arm-linux-gnueabihf
--runtime-mode debug
ninja -C out/linux_debug_unopt_arm
Most of the options are clear: build for 32-bit ARM processor and Linux, while turning off everything unnecessary with --embedder-for-target --disable-desktop-embeddings.
For this build, the system must have clang version 9 or higher, i.e. this is a standard Flutter build engine, and the gcc cross-compilation toolkit will not work. The most important thing is to specify the correct target-sysroot of the RDK-based device.
Frankly, we were surprised that there were no nuances at all during the building process. The output is the coveted flutter_engine.so library and a header with the necessary functions for the embedder.
We can now build a flutter/dart target project with our library/engine. It's easy to do:
flutter --local-engine-src-path PATH_TO_BUILDED_ENGINE_src
--local-engine=host_debug_unopt build bundle
Warning! The project must be built not on the device with the built library, but on the host device, i.e. x86_64! To do this, go through the gn and ninja builds again on x86_64 only! This is what is specified in the host_debug_unopt parameter. PATH_TO_BUILDED_ENGINE_src is the path where engine/src/out is located.
Embedder is usually responsible for running the Flutter Engine on the system, and it configures Flutter for the target system and gives the main rendering contexts to the Skia library and the Dart handler. Not so long ago they added linux-embedder to Flutter, and GTK-embedder in particular, so you can use it out of the box. On our platform this was not an option at the time of porting, so we needed something independent of GTK.
Let's consider some peculiarities of implementation, which had to be taken into account with custom embedder (everyone who likes to take apart not nuances but source code in its entirety, can go straight to our fork project with modifications on github.com). In addition, our version slightly outperformed the GTK version, which was extremely important to our customer. Moreover, it did not drag down the whole zoo of the GTK libraries.
So what does an embedder need to run a Flutter application anyway? It is enough to call flutter_engine.so from the library
FlutterEngineRun(FLUTTER_ENGINE_VERSION, &config, &args, display /* userdata */, &engine_);
where parameters are the project settings for FlutterProjectArgs args (the directory with the built flutter bundle) and rendering arguments FlutterRendererConfig config.
The first structure specifies the path of the bundle package built by the Flutter utility, and the second uses OpenGL contexts.
// see an example of use on github.com
It's pretty simple, but it's enough to run the application.
Problems and solutions
Now let's talk about the nuances we encountered during the porting phase. How could it be without them? It's not just about building libraries, is it? :-)
1. Embedder crash and changing the function call queue
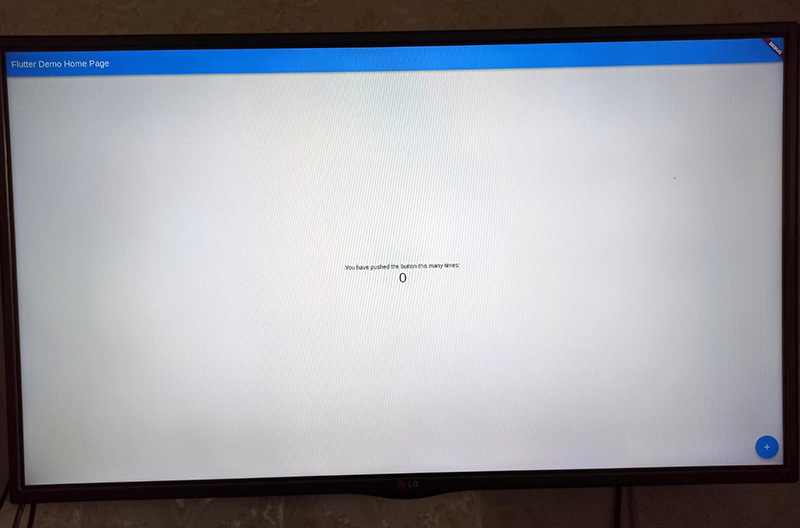
The first problem we encountered was an embedder crash on our target platform. The initialization of the gel context in other applications was normal, FlutterRendererConfig was initialized correctly, however, the embedder did not start. So there's obviously something wrong with it. It turns out that eglBindAPI cannot be called before eglGetDisplay, which is where the nexus display driver is specifically initialized (our platform is based on a BCM chip). For "usual" Linux this is not a problem, but on the target platform it turned out to be different.
The correct initialization of the embedder looks like this:
egl_display_ = eglGetDisplay(display_);
		if (egl_display_ == EGL_NO_DISPLAY) {
		LogLastEGLError();
		FL_ERROR("Could not access EGL display.");
		return false;
		}
		if (eglInitialize(egl_display_, nullptr, nullptr) != EGL_TRUE) {
		LogLastEGLError();
		FL_ERROR("Could not initialize EGL display.");
		return false;
		}
		if (eglBindAPI(EGL_OPENGL_ES_API) != EGL_TRUE) {
		LogLastEGLError();
		FL_ERROR("Could not bind the ES API.");
		return false;
		}
// github.com — this is our correct implementation, i.e. the changed order of function calls helped. Now that the nuance of the launch is taken care of, we are happy to see the coveted demo app window on the screen :-).

2. Optimizing performance
It's time to check the performance. And frankly speaking, it didn't please us much in debug mode. Something was fast, and something was slower than EFL+Node.js with frame lags.
We got a little frustrated and started digging further. The Flutter SDK has AOT, a special machine code compilation mode, it's not even a jit but a compilation to native code with all the associated optimizations. This is what is meant by the Flutter release version. We did not have that kind of support in the embedder, so added it.
Certain instructions were needed, given by arguments to FlutterEngineRun
// the full implementation is here: github.com (elf.cc)
vm_snapshot_instructions_ = dlsym(fd, "_kDartVmSnapshotInstructions");
		if (vm_snapshot_instructions_ == NULL) {
		error_ = strerror(errno);
		break;
		}
		vm_isolate_snapshot_instructions_ = dlsym(fd, "_kDartIsolateSnapshotInstructions");
		if (vm_isolate_snapshot_instructions_ == NULL) {
		error_ = strerror(errno);
		break;
		}
		vm_snapshot_data_ = dlsym(fd, "_kDartVmSnapshotData");
		if (vm_snapshot_data_ == NULL) {
		error_ = strerror(errno);
		break;
		}
		vm_isolate_snapshot_data_ = dlsym(fd, "_kDartIsolateSnapshotData");
		if (vm_isolate_snapshot_data_ == NULL) {
		error_ = strerror(errno);
		break;
		}
		if (vm_snapshot_data_ == NULL ||
		vm_snapshot_instructions_ == NULL ||
		vm_isolate_snapshot_data_ == NULL ||
		vm_isolate_snapshot_instructions_ == NULL) {
		return false;
		}
		*vm_snapshot_data = reinterpret_cast <
		const uint8_t * > (vm_snapshot_data_);
		*vm_snapshot_instructions = reinterpret_cast <
		const uint8_t * > (vm_snapshot_instructions_);
		*vm_isolate_snapshot_data = reinterpret_cast <
		const uint8_t * > (vm_isolate_snapshot_data_);
		*vm_isolate_snapshot_instructions = reinterpret_cast <
		const uint8_t * > (vm_isolate_snapshot_instructions_);
		FlutterProjectArgs args;
		// we pass on everything necessary to args
		args.vm_snapshot_data = vm_snapshot_data;
		args.vm_snapshot_instructions = vm_snapshot_instructions;
		args.isolate_snapshot_data = vm_isolate_snapshot_data;
		args.isolate_snapshot_instructions = vm_isolate_snapshot_instructions;
Now that everything is there, we need to build the application in a special way to get an AOT compiled module for the target platform. This can be done by running a command from the root of the dart project:
$HOST_ENGINE/dart-sdk/bin/dart \
		--disable-dart-dev \
		$HOST_ENGINE/gen/frontend_server.dart.snapshot \
		--sdk-root $DEVICE_ENGINE}/flutter_patched_sdk/ \
		--target=flutter \
		-Ddart.developer.causal_async_stacks=false \
		-Ddart.vm.profile=release \
		-Ddart.vm.product=release \
		--bytecode-options=source-positions \
		--aot \
		--tfa \
		--packages .packages \
		--output-dill build/tmp/app.dill \
		--depfile build/kernel_snapshot.d \
		package:lib/main.dart
		$DEVICE_ENGINE/gen_snapshot \
		--deterministic \
		--snapshot_kind=app-aot-elf \
		--elf=build/lib/libapp.so \
		--no-causal-async-stacks \
		--lazy-async-stacks \
		build/tmp/app.dill
No need to be intimidated by the huge number of parameters, most of them are standard. Specifically:
-Ddart.vm.profile=release \
	-Ddart.vm.product=release \
indicate that we do not need a profiler in the package and we have the product version.
output-dill is needed to build the native libapp.so library.
The most important paths for us are $DEVICE_ENGINE and $HOST_ENGINE —the two built engines for the target (ARM) and host (x86_64) systems respectively. It is important not to mix things up and make sure that libapp.so is the 32-bit ARM version:
$ file libapp.so
		libapp.so: ELF 32-bit LSB shared object, ARM, EABI5 version 1 (SYSV),
		dynamically linked
We are starting it up a-a-a-nd... voila! — Everything works!
And it works much faster! Now we can talk about comparable performance and rendering efficiency with the original application based on the set of EFL libraries. Rendering works almost seamlessly and almost perfectly in simple applications.
3. Connecting input devices
For the purposes of this article, we will skip the story of how Wayland and embedder became friends with the remote control, mouse, and other input devices. You can look at their implementation in the source code of the embedder.
4. The interface on Linux and Android STB and how to increase performance by 2—3 times
Let's touch on a few other performance nuances encountered in the product UI application. We were very pleased with the authenticity of the UI on the target device as well as on Linux and Android. Now, Flutter can boast very flexible portability.
Another interesting experience is the optimization of the dart application itself for the target platform. We were disappointed by the rather poor performance of the product application (unlike the demos). We took a profiler and started digging and pretty soon found active use of __brcmcm_cpu_dcache_flush and khrn_copy_8888_to_tf32 functions during animations (our platform uses a processor chip by Broadcom/BCM). Clearly, there was some very hard pixel software transformation or copying during the animations. In the end, the culprit was found — there were blur effect in one of the panels:
//...
		filter: new ImageFilter.blur(sigmaX: 10.0, sigmaY: 10.0),
		//…
Commenting on this effect alone gave us two- or threefold increase in productivity and brought the application to stable 50—60 fps. This is a good example of how one specific effect can destroy the performance of an entire application on Flutter, even though it was just in one panel, which was hidden most of the time.
The result
As a result, we got not just a working product application but a working application with a quality frame rate on Flutter on our target STB. The fork and our version of the embedder for RDK and other Wayland-based platforms can be found here: github.com (flutter_wayland)
We hope that our team's experience in developing and porting software for set-top boxes and Smart TV will come in handy for your projects and serve as a starting point for porting Flutter to other devices.
Credits. I would like to thank Alexey Kasyanchuk, our software engineer, for his valuable contribution to this article. Your questions and comments are welcome. We will be glad to share our experience in the development of custom Smart TV apps.
Our projects


